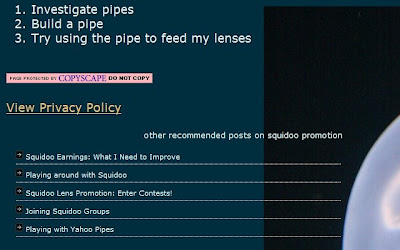
While doing some SEO research I found that having related posts at the end of your blog posts is a good thing to do. It helps keep readers at your site longer. It gives readers additional posts to peruse on your subject matter. Among other SEO things, It also looks kind of cool.
My blog buddy Peter from St Vincent's Hospital Darlinghurst - Male Nurses asked me about my related posts widget in a comment recently. I thought it might be prudent to post how I went about adding the widget to my blog.
First, the SEO blog I found commenting about related posts explained how to get it done at Wordpress. Apparently that platform has the widget as an add-on. Blogger does not. Well, luckily, I'm pretty good searching keywords. I plugged "related posts blogger" into my Google search bar and came up with plenty of resources.
The first few did not work for me. Either I did not get the code in right or the instructions left me in a daze. I found this post: Related Posts Widget For Blogger to get the job done for me. Use the second set of instructions. The first did not work.
You will also need to host the little plus image on your own image hosting site. I use Photobucket and it's proven to be very reliable.
Once you get your related posts up you will not be able to view your work in the preview mode, it must be saved and you have to click a post to see it. Ensure you download a copy of your template before you start chopping away at it. Just in case you make any mistakes.
If you are still afraid of messing with your template html, you can always make a dummy template account and play with the html at your will. I did this and I'm loving messing with my templates regularly. It's especially beneficial for making those little changes you need to make but are not quite sure about.
- Create a dummy blog by clicking "Create a Blog" on your dashboard.
- Name your tester blog anything you wish. I call mine Template Tester.
- Once your test blog is live, go to your main blog and copy the entire template html from the Layout tab: edit html section.
- Once you have copied your entire template html, take it back to your test blog and paste it into the same html section on the test blog.
- Click preview and if everything worked out correctly you should see your main blog's template before you.
At this point you can make any alterations or additions to the template html without worry.
For the related posts widget, remember your test blog does not have any posts. You will need to make up a few posts and tag or label them so you can view your related posts widget in action.
If you like everything you've done to your blog's template in the test blog, copy the entire html code and paste it over your main blog's html. Preview the template to ensure it's there then save it.
Double check your widget is there by clicking a post.
Important note: Related post widgets will not work unless you have your posts labeled.


